Notifications are the text messages (email or SMS) that are sent from PortaBilling® to the users: about accounts generation, custom reports, DID upload, etc.
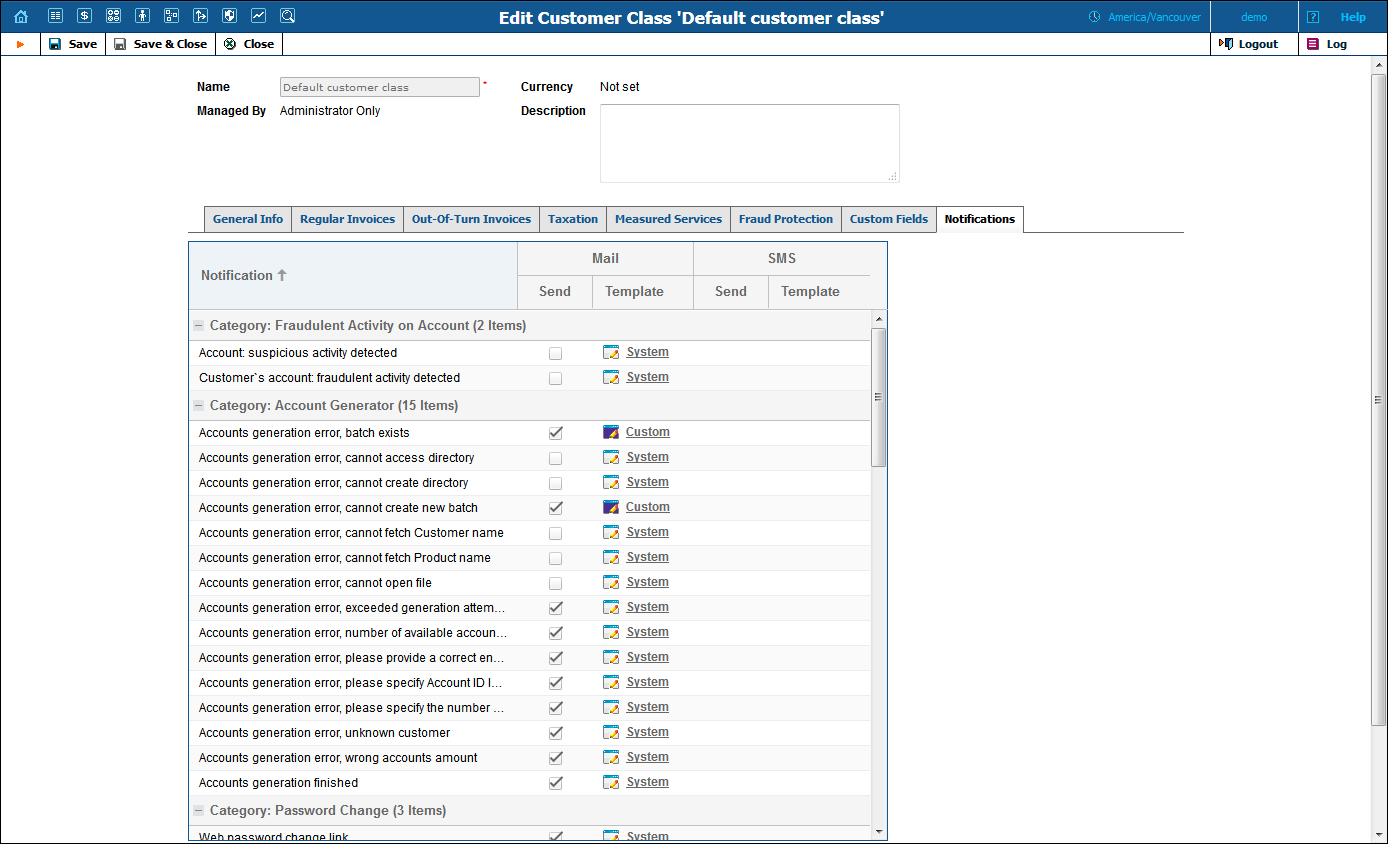
The Notifications tab allows you to manage notification templates and define which email and / or SMS notifications to send to your customers.

For more information about notification templates, please refer to the Notification Templates and APPENDIX D. Available Notification Templates sections of the PortaBilling Templates Guide.
| Field | Description |
|---|---|
Notification |
The notification name. |
Send |
Select this check box to send the corresponding notification to customers via email. |
Template |
This shows whether the notification template has been modified:
Note that a template becomes a Custom template once you save it after editing it, regardless of whether it has actually been modified or not. |
SMS |
|
Send |
Select this check box to send the corresponding notification to customers via SMS. |
Template |
This shows whether the notification template has been modified:
Note that a template becomes a Custom template once you save it after editing it, regardless of whether it has actually been modified or not. |
To edit an email notification template, click the Custom / System link in the Mail column and specify all the required parameters on the Edit Email Template page.
To edit the SMS notification template, click the Custom / System link in the SMS column and specify all the required parameters on the Edit SMS Template page.
Note that for a user being created, Custom / System links are unavailable. You can only edit a notification template for a user that has already been created.
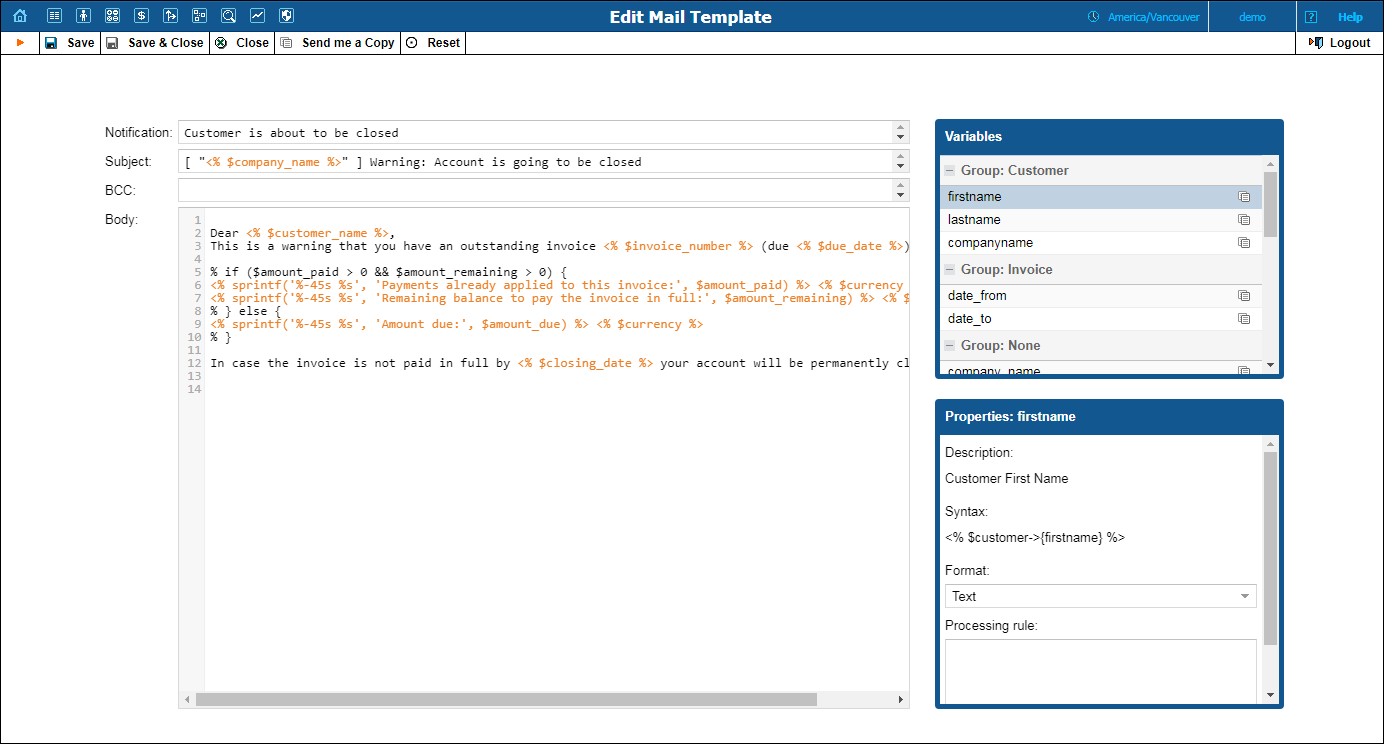
The page title reflects the type of template being edited and can be either Edit Email Template or Edit SMS Template.
This page allows you to modify the subject, body, format and post processing rule for variables.

| Field | Description |
|---|---|
Notification |
The notification name. This is a read-only field. |
Editing Area |
|
Subject |
The subject as it appears in an email to a customer. |
BCC |
The area to put email addresses of persons who want to receive a copy of this notification. You can specify more than one valid email address; make sure you separate them with commas. |
Body |
The content of the message. |
Variables |
This is a list of variables available for this template. This list cannot be modified.
For easier management, template variables are organized into groups. To add a variable that is included in a group to the notification template, use the following format: <%$group_name->{variable_name} %>.
Variables that are not included in any group can be found under the Group: None list. To add a variable that is not included in any group to the notification template, use the following format: <% $ variable_name %>.
Click the variable to see its properties in the Properties area. You can use the drag and drop function to add variables to the notification template. |
Group |
For easier management, template variables are organized into
groups. To add a variable group into the template, use the following
format:
<%$group_name->{variable_name}.
For example, <%$customer> |
Properties |
|
Description |
The description of the selected variable. |
Format |
The format of the variable.
|
Formatting rule |
This option is only available when Other is selected for the Format. Type the definition of the required format for the variable. |
Processing Rule |
The processing rule for variables that can be specified using regular expressions in Perl. |
To reset a notification template to its default settings, click the
 Reset
button on the toolbar.
To check that the template is configured as required, an administrator can send a test copy of the notification to their own email address (the email address configured in the user settings).
To receive a test copy of the notification, click the  Send me a Copy
button on the toolbar.