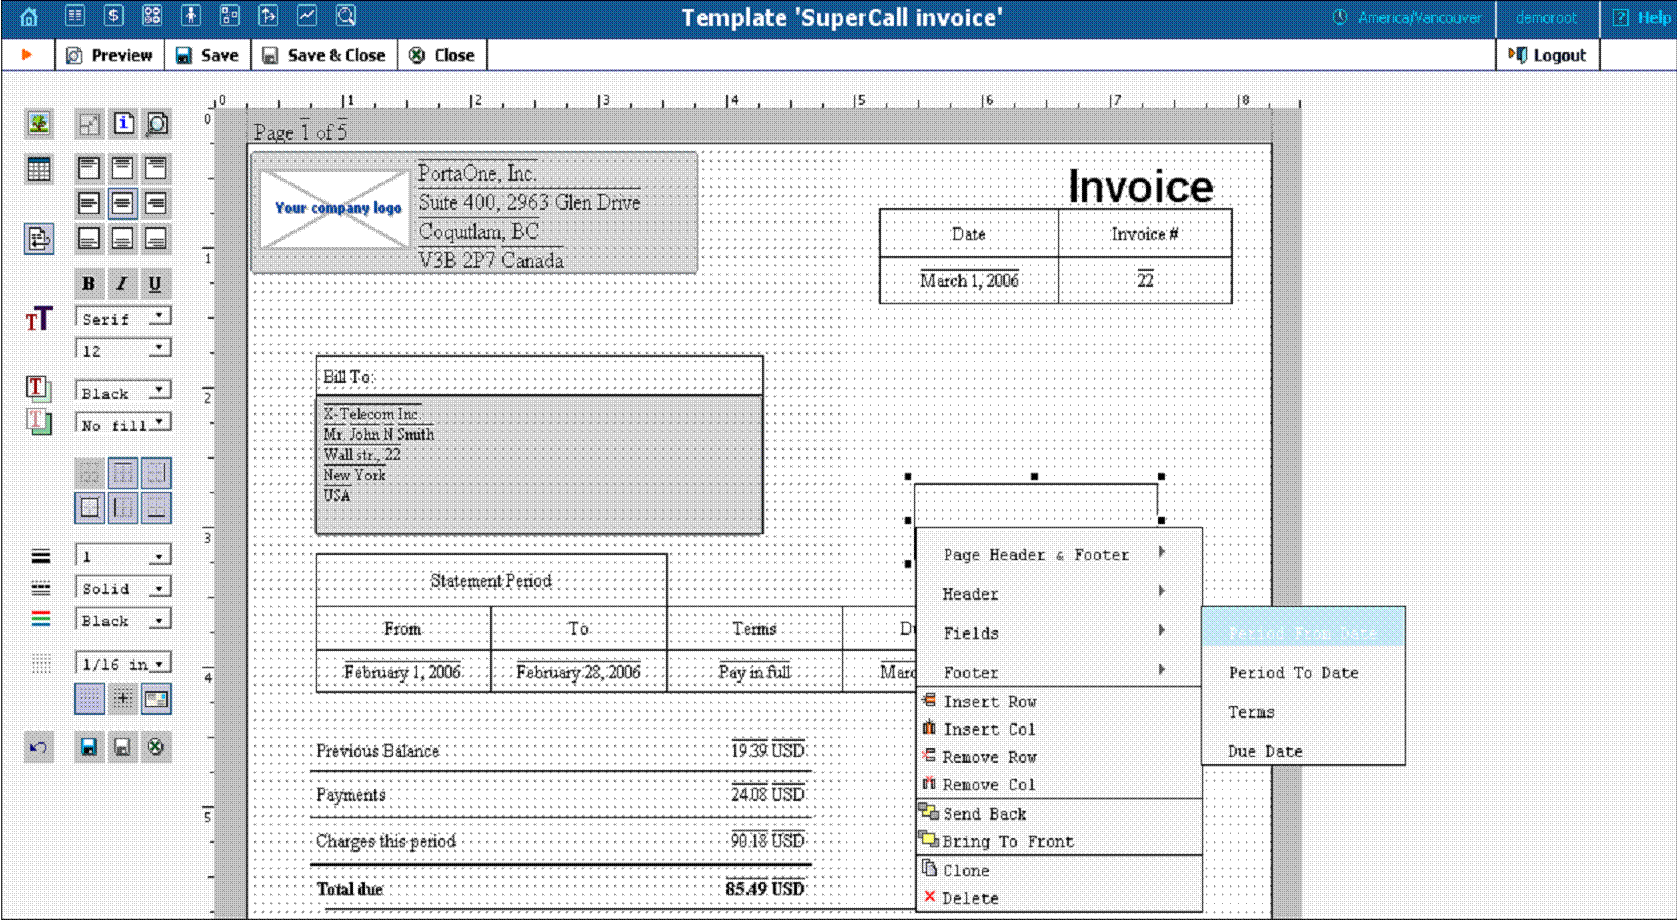
The Layout Designer allows you to customize the appearance of all types of printed output in PortaBilling®.
To launch, click the Layout Designer button on the Media tab in the Template Management window. The sliding toolbar on the left side provides most of the controls for manipulating content in the editor window. There are three different states for most of the toolbar icons: normal, active, and not available.
| Icon state | Description |
|---|---|
|
Normal. Click to activate |
|
Active. Click to deactivate |
|
Not available |
| Icon | Description |
|---|---|
|
Add Picture – Click to select a picture (e.g. your company logo) from a file select window. Click the Open button to place the picture on the worksheet. To remove the picture, right-click on it and choose Remove. Another way of deleting a picture is to press Delete on your keyboard. |
|
Lock Aspect – Fixes image proportions during scale operations. |
|
Preview – Click to preview your work in a browser window. |
|
Add Table – Click to place a table on the worksheet. A table can be removed by using the context (right-click) menu or by pressing Delete on your keyboard. Click the table cell to make it active. To add another table, click on the worksheet to deactivate the currently active object. Read more about tables below. |
|
Text Align – A section of nine buttons used to align text in an active table cell. |
|
Word Wrap |
|
Text controls – The tools and selects from this section control font attributes such as font style (bold, italic, underline), font family (serif, sans-serif, cursive, fantasy, monospace), and font size. |
|
Foreground Color – Change the text color by selecting from this list. |
|
Background Color – Change the color of the active table cell by selecting from this list. |
|
Border – A section of six buttons for showing or hiding the border of the active table cell. |
|
Stroke – A section of three controls for changing the active cell’s border weight, style and color. |
|
Grid – On by default; click to turn off the grid. |
|
Snap to Grid – On by default; click to allow arbitrary positioning of elements on the worksheet. |
|
Envelope Window – Two half-transparent gray boxes displaying the positions of envelope windows; click to turn off. |
|
Undo – Click to cancel the last action. |
|
Save and Close – For convenience in editing the bottom of the worksheet, these controls duplicate the main toolbar controls. |
 A straight line in
the Layout Designer can be simulated by using a table with only one visible
border.
A straight line in
the Layout Designer can be simulated by using a table with only one visible
border.
The main Layout Designer object is the table, which is a placeholder for all inserted information. A table or a table cell within a table can be moved and scaled by dragging the cell handlers. Double-click a table or a cell within a table to enter cell editing mode, where you can type in or edit a cell’s text. To change the attributes of a cell’s text, make sure the cell is selected (8 black square handlers are visible) and set the text attributes in the toolbar on the left.
Changing the text attributes of a cell in the toolbar will affect all text in the current cell. To change the attributes of part of the text, enter cell editing mode (double-click), select that part of the text, and use the keyboard shortcuts listed below.
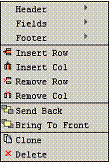
The context (right-click) menu provides you with greater control over tables and other objects, and allows certain data located in the PortaBilling® database to be displayed in the table cell. To show the menu, right-click on a table or cell. The three top elements of the context menu correspond to the template components (tabs); in the case of an invoice, for example, these would be Header, Fields and Footer. Users can also set the order of all objects in the window and clone or delete selected objects.
Select one of the menu elements to activate a submenu containing a list of all the fields specified in the template editing window. The selected item will appear in the selected cell as the item’s value. Double-click the cell to enter editing mode; the cell now displays the corresponding variable.
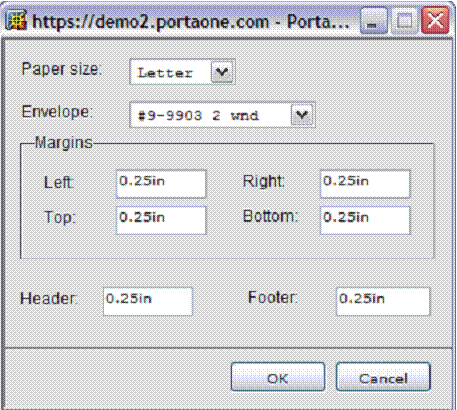
The page context menu (right-click on the worksheet) provides access to the Web-Page Dialog for page, envelope and print setup.
 Open your
browser prior to printing. In your browser’s File menu,
select Page Setup. In the dialog window, set up the paper
size (A4 or Letter), delete all Header and Footer symbols, and set all
margins to zero or a value close to zero.
Open your
browser prior to printing. In your browser’s File menu,
select Page Setup. In the dialog window, set up the paper
size (A4 or Letter), delete all Header and Footer symbols, and set all
margins to zero or a value close to zero.
| Envelope | Envelope Measurements | Window size | Window From Left | Window From Bottom |
|---|---|---|---|---|
#6-3/4 |
3-5/8” × 6-1/2” |
1-1/8” × 4-1/2” |
7/8” |
1 / 2” |
#7 |
3-3/4” × 6-3/4” |
1-1/8” × 4-1/2” |
7/8” |
1 / 2” |
#7-3/4 |
3-7/8” × 7-1/2” |
1-1/8” × 4-1/2” |
7/8” |
1 / 2” |
#8-5/8 |
3-5/8” × 8-5/8” |
1” × 4” |
1” |
3 / 4” |
#9 |
3-7/8” × 8-7/8” |
1-1/8” × 4-1/2” |
7/8” |
1 / 2” |
#10 |
4-1/8” × 9-1/2” |
1-1/8” × 4-1/2” |
7/8” |
1 / 2” |
#11 |
4-1/2” × 10-3/8” |
1-1/8” × 4-1/2” |
7/8” |
1 / 2” |
#12 |
4-3/4” × 11” |
1-1/8” × 4-1/2” |
7/8” |
1 / 2” |
#14 |
5” × 11-1/2” |
1-1/8” × 4-1/2” |
7/8” |
1 / 2” |
| Envelope | Window Size | Location | Placement |
|---|---|---|---|
#9-9903 |
TOP WINDOW |
||
3 7/8” × 8 7/8” |
From Left |
3/8” |
|
From Top |
1/2” |
||
3 5/8” x 8 5/8” |
BOTTOM WINDOW |
||
1” × 4” |
From Left |
7/8” |
|
From Bottom |
5/8” |
||
# 8-5/8 |
TOP WINDOW |
||
7/8” × 3-1/2” |
From Left |
5/8” |
|
From Bottom |
2 1/4” |
||
3 5/8” x 8 5/8” |
BOTTOM WINDOW |
||
1” × 4” |
From Left |
5/8” |
|
From Bottom |
5/8” |
||
#9-13036 |
TOP WINDOW |
||
7/8” × 3-1/4” |
From Left |
3/8” |
|
From Bottom |
2-1/2” |
||
3 7/8 x 8 7/8” |
BOTTOM WINDOW |
||
1-1/8” × 4-1/2” |
From Left |
1/2” |
|
From Bottom |
7/16” |
||
#9-13037 |
TOP WINDOW |
||
7/8” × 3-1/4” |
From Left |
3/8” |
|
From Bottom |
2-1/2” |
||
3 7/8 x 8 7/8” |
BOTTOM WINDOW |
||
1” × 4” |
From Left |
1/2” |
|
From Bottom |
3/4” |
||
#9-13038 |
TOP WINDOW |
||
7/8” × 3-1/2” |
From Left |
3/8” |
|
From Bottom |
2-3/8” |
||
3 7/8 x 8 7/8” |
BOTTOM WINDOW |
||
1-1/8” × 4” |
From Left |
3/8” |
|
From Bottom |
5/8” |
||
NOTE: Envelope #9-9903 (3 7/8” x 8 7/8”) is QuickBooks compatible.
| Format | Size [mm] | Content Format |
|---|---|---|
C6 |
114 × 162 |
A4 folded twice = A6 |
DL |
110 × 220 |
A4 folded twice = 1/3 A4 |
C6/C5 |
114 × 229 |
A4 folded twice = 1/3 A4 |
C5 |
162 × 229 |
A4 folded once = A5 |
C4 |
229 × 324 |
A4 |
DIN 680 specifies that a transparent address window should be 90 × 45 mm in size, and the window’s left edge should be located 20 mm from the left edge of the envelope. For C6, DL, and C6/C5 envelopes, the bottom edge of the window should be 15 mm from the bottom edge of the envelope. For C4 envelopes, the top edge of the window should be either 27 or 45 mm from the top edge of the envelope.
| Shortcut | Action |
|---|---|
Arrow keys |
Move objects with grid size increments. |
Ctrl – arrow key |
Use to scale table cells or images with current grid size increments. |
Cell editing mode |
|
Ctrl-A |
Selects all objects in the Template window if nothing is selected, or selects all text in an active table cell. |
Ctrl-C |
Copy selected text. |
Ctrl-V |
Paste clipboard text starting from the current cursor position. |
Ctrl-X |
Cut highlighted text. |
Ctrl-I |
Change selected text style to Italic. |
Ctrl-B |
Change selected text style to Bold. |
Ctrl-U |
Change selected text style to Underline. |
Ctrl-K |
Hyperlink selected text (opens hyperlink editing dialog). |
Netscape or Mozilla
users may experience the lack of a movable cursor allowing them to select
text from the keyboard in cell editing mode. Press the F7
button to turn the edit cursor (caret browsing) on and off.
Users with a small screen resolution may enjoy the benefits of their browser’s full-screen mode. Simply press the F11 button to switch your Mozilla or IE into full-screen mode..


