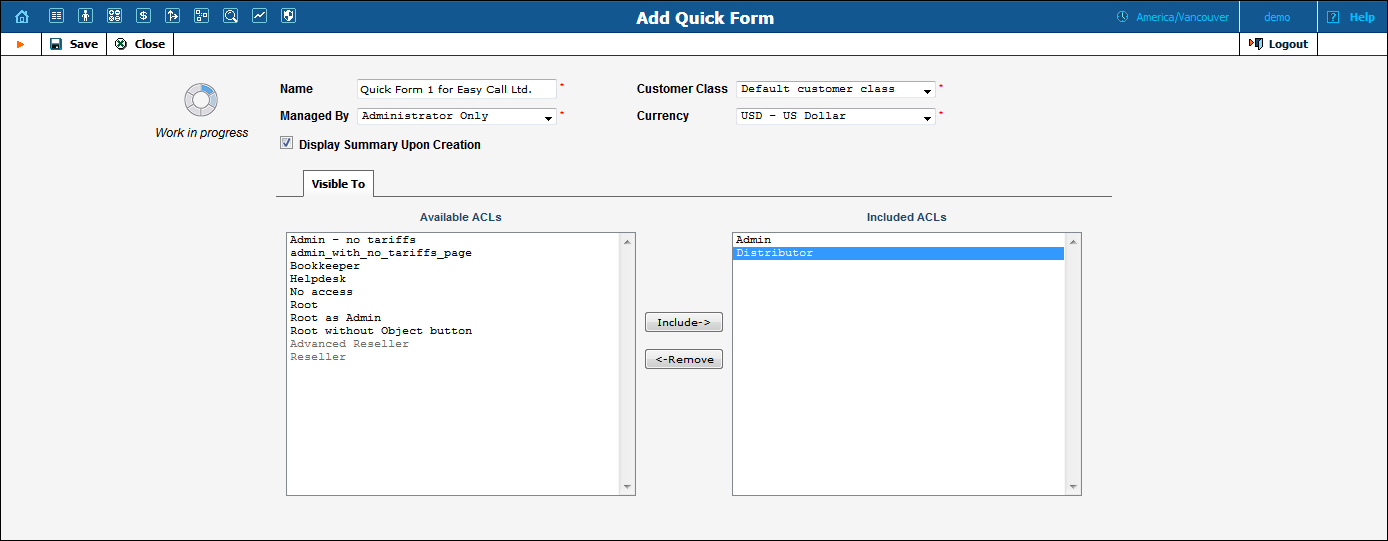
After creating the initial quick form definition, you need to specify which fields in the customer and account information will be pre-populated, and which are to be filled in later by a data entry person. To do this:
 Choose
Controls on the toolbar.
Choose
Controls on the toolbar. Save
on the toolbar to save the details. Save
on the toolbar. Save.
Save
on the toolbar to save the details. Save
on the toolbar. Save.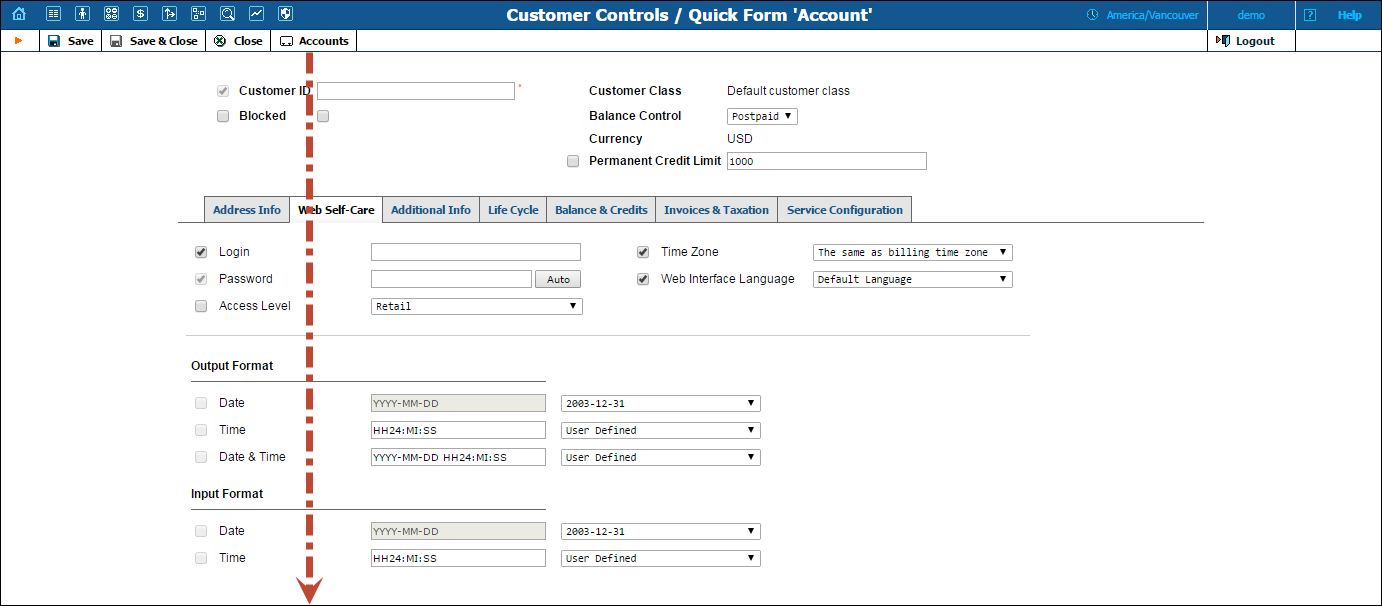
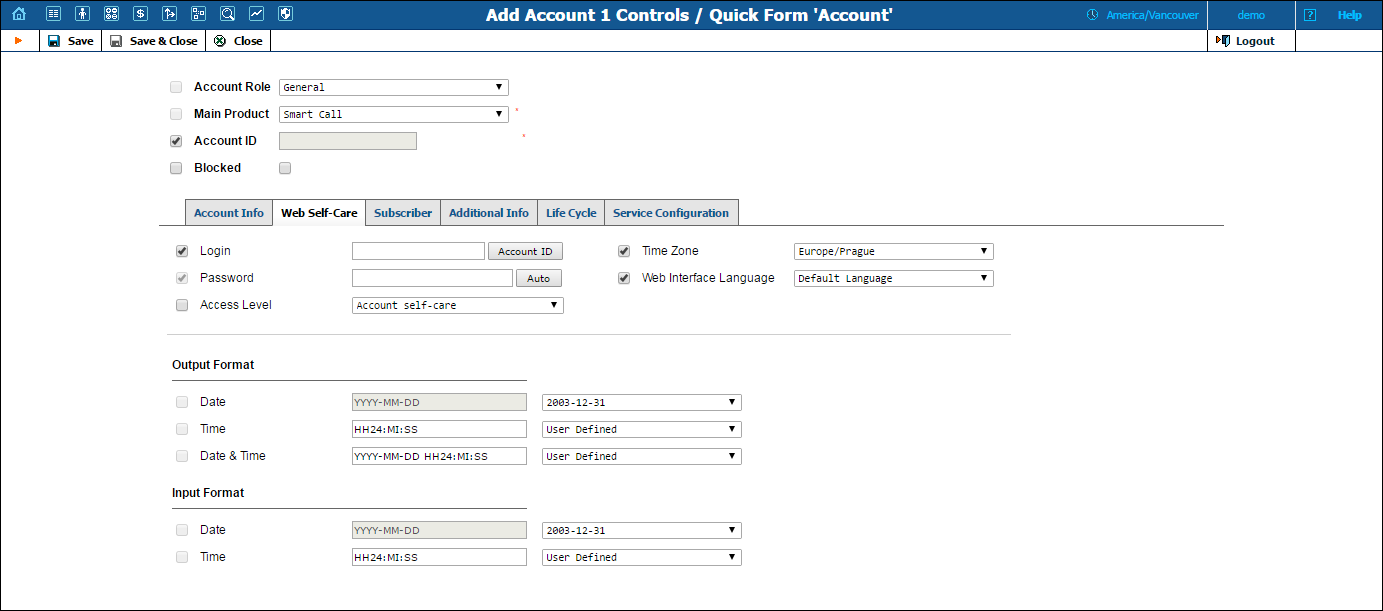
The check box next to the field defines its status with regard to data entry. If the check box is selected, this means that the data entry person will be prompted to enter a value for this field (you can still specify a default value for this field). If the check box is not select, you must provide a value for this field when defining the quick form, which will then be inserted into the database.
NOTE: Values for some fields must be entered by the data entry person, since they must be unique (e.g. Customer Name).